Diamond roses are actually a miniature series of rose flowers. Because of their short branches and flowers as big as bean buttons, they are nicknamed "diamond roses" or "pocket roses." A real-life illustration of diamond and rose origami from "Old City Hidden". The steps are very detailed and the pictures are very clear. Come and try it with the author~

Materials: A piece of square colored paper
Auxiliary tools: tweezers (it’s okay if you don’t have tweezers), refills

Square colored paper

1. Fold in half diagonally

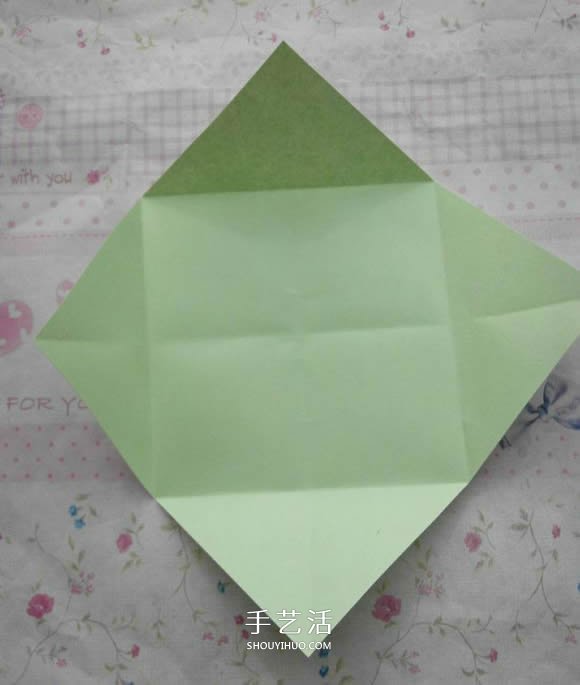
2.Expand

3. Fold the other side diagonally in half, then unfold

4. Align the sharp corner of one side with the intersection of the cross crease and fold it down

5. The other sharp corner is also folded towards the center intersection

6. Fold the remaining two sides toward the center

7.Expand

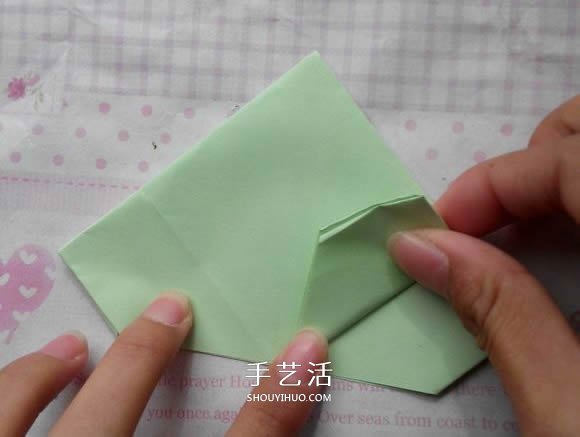
8. Fold the sharp corners to the new crease you just made

9. Fold the second one

10. Fold all four sharp corners

11. Turn to the back

12. Fold upward

13. Frontal expansion

14. Fold along the crease you just obtained

15. It became like this

16. Follow the crease and fold to the middle

17. Compaction

18. The other side is also folded to the middle (did you notice that it looks like a heart at this time)

19. Turn to the back

20. Fold one side

21. Same on the other side
22. Open one side

23. Compaction

24. Open and compact the other side

25. Turn to the back and follow steps 22 to 24 (as shown in the picture, follow the arrows)

26. Fold the sharp corners in the middle

27. Restore and see a new crease

28. Open the triangle from the inside (follow the arrow)

29. Then put the triangle-like angles on both sides into the larger triangle

30. Turn to the back and do the same thing (yes, you read it right, this is the same as the picture above, so the steps are the same)

31. Fold the right side to the left side

32. The folded look

33. Turn to the reverse side

34. Fold the right side in half to the left

Viewed from above

35. After laying it flat, fold the two sides toward the middle

36. Turn to the back and follow the picture

37. Fold the sharp corners

38.Recovery

39. Open according to the new crease from the inside and compact it

40. Place the small triangle inside the big triangle

41. Turn over to the back, fold the triangle and restore it

42. Place the small triangle into the big triangle

43. Turn to this direction

44. Fold the sharp corners downward

45. Oppose turning back

46. Turn back this time, with the sharp corners facing upwards, and focus on the black line

47. Support the middle with your hands from behind

48. The key point is that you can see that there is a square in the place where it is propped up. It is a smaller circle, not a big one

49.Pinch out the square part

50. Now focus on the second line, which is the yellow dotted line

51. Hold both sides with both hands, and then fold along the second line

52.After folding

53. Fold the other side and then stand it in the middle

54. This step is a bit complicated, please study the diagram several times. Pinch the top left one, then push it over and compact it

55. Pinch, push and compact the lower right side

56. Press the side where your left thumb is pressed and push it in along the arrow, also on the opposite side

57. Form a clockwise wind pattern

58. Turn to the back

59. Take outUse your scissor hand (index finger and middle finger) to open the bottom clockwise, and rotate and compact while supporting

60. The appearance of rapid compaction

61. The back after pressing

62. Front view

63. Extrude the middle square from all four sides to the middle

64. It must look like this!

65. Tweezers are here! Put them in the middle

66. Rotate clockwise

67. After things get better

68. Use the pen core to curl all four sides

69. Diamond rose origami completed


