I'm too lazy to place an order and just want to write something. This article explains how to make this keychain in detail. Its still the same old rule, only explaining the difficulties that will be encountered in the production process, not the basics. ★The article will explain in detail the non-cut drumming method and then let me brag about it, this one is semi-original! I have never seen it in the circle. This key chain is not the same on Taobao, nor is the Lucky Cat button! without! have! Because it is hand-engraved, the price is not low. I will make orders from time to time. If you are interested, you can contact me to join a group purchase. Download the drawings of the keychain at http://img2.pixiaojiang.com/20200507ysk0.pdf 1. The layout is very simple, with only two sheets, one large and one small. The middle one is the cushion core, and the top one is the bottom skin, not the dough. There is no dough. As long as the pattern is larger than the overall shape, the thickness is recommended to be 1.0mm. Although it is vegetable tanned, the chrome tanning process is used.

2. Amount Check the width, it is best to be accurate to 0.5mm. The bottom leather is recommended to be 0.8-1.0mm

There is no requirement for the thickness of the cushion core. I used 3.0mm. This can lead to a conclusion. The size of the cushion core has nothing to do with the size of the dough, and only depends on the outer contour of the bottom skin. relation.

3. Draw range, prepare to paste the cushion core, ensuring that the distance between the three sides is equal.

4. Peel The purpose of this is to make the finished product more rounded.

5. Attach a cushion core to prevent wrinkles on the back of the finished product. I picked one up and friends can use it
Can, or a cylinder with a smaller radius.

6. Fold the tail in half to just hold the cushion core. The end end is recommended to be 0.8mm. You can thin it by hand and prepare Stick to the skin.

7. Apply glue on both sides, either 1618B or KS. The straight line cut out from one end of the dough must be glued starting from the tail. Note that the cushion core is not only glued on the surface, but also glued on the 3mm thick section!

8. Plasticity (I’ll knock on the blackboard ) Next comes the details! The shaping is completed in three steps, so don’t rush. I didn’t use water for this shaping because I was afraid of staining the original leather, but you can also use water. For the first time, use your hands slowly to shape the shape. Pinch slowly, you can already see the outline!

9. For the second plasticity, I used a homemade sandalwood plastic rod. If you don’t have it, you can use the white imitation cow bone rod online. You can buy it everywhere. Pay attention to the corners. I cut a few lines. These lines must be cut. The leather is stretched at the corners, and there is rebound force at the R corner that affects the plastic effect. The purpose of cutting the lines is to allow the rebound force to dissipate!

10. The third plasticity, For fine plasticity, I use an indentor, which everyone who plays leather carving should know. I also use the width of the metal head of the indentor to leave the traces of the subsequent cuts.

11. Cutting, the version does not require cutting, feel free to .

12. The next step is not cutting, but sewing, because the thing in your hand is not yet stable.

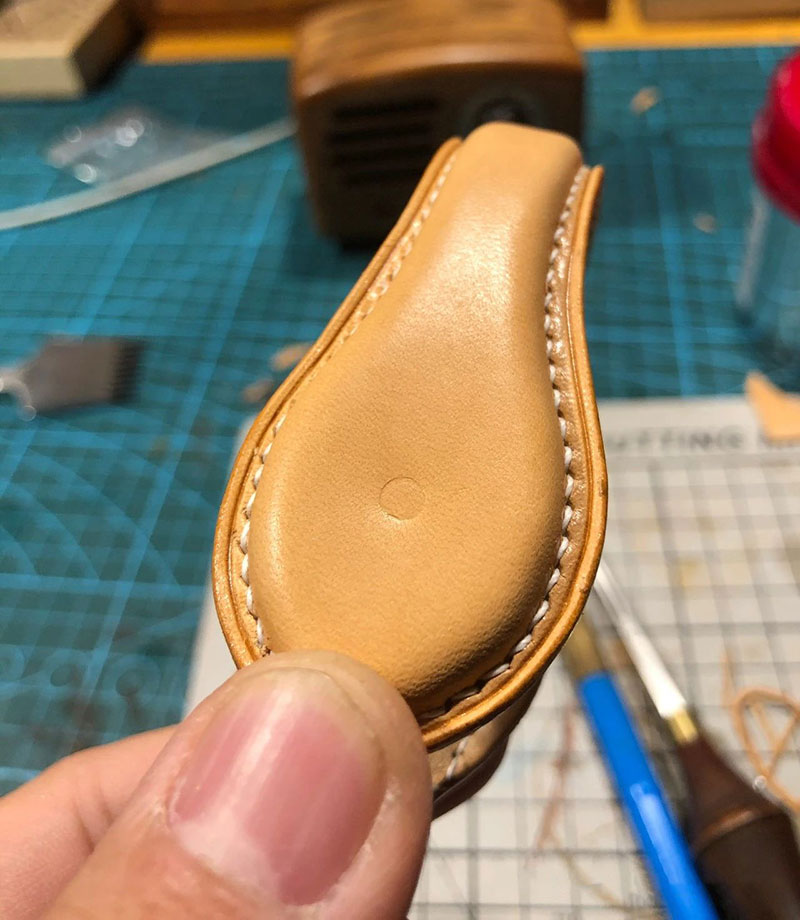
13. Cut, put the skin down, and cut accurately according to the outline of the bottom skin. Because there is a raised bulge, a piece of core skin must be used as a pad. Cut things of similar thickness, otherwise it will not be accurate, and it will be more troublesome to align the edges at the back. It will affect the effect of the finished product.

14. After I cut it, it looks like this, and then I can iron the edges, seal them or oil them.

15. Position the buttons, the version is not given The position of the button, because the position is related to the diameter of the button, you can set it yourself. The plain style or the folding lock should look good.

16. If you have higher plasticity requirements, try this one again.

17. Finished product display, without digging wire trough The craftsmanship seems to have dug a wire groove. After folding, the edges are slightly upward and the center line of the cushion core sinks slightly, giving you a visual enjoyment.

18. If you are interested in continuing the research, cut it open and observe, the one with a thickness of 3mm Top coating is crucial and will directly affect the final shape of the finished product.

The pictures below are full of RMB!

The lucky cat keychain is priced at RMB 550. It needs to be pre-ordered and the color can be chosen! There are three things here, on the left Just like Xia Li, justIts enough but you can't take it out. The middle one is like the Magotan, which is comfortable and comfortable. The right side is like the Audi Q7, which is a visual enjoyment and can help you pick up girls! Choose it yourself. Don't say its expensive. That means you don't have the financial strength to do it. You should taste it carefully.

This article is reproduced from " monster handmade
Leather Goods" WeChat public account
Keychain Qigu < /p>


