In order to facilitate everyones production, I plan to take a detailed photo of the production process! Main materials: vegetable tanned leather, more than one foot. Tools required: acrylic mold, fixed-position shape, suture tool. Production steps:
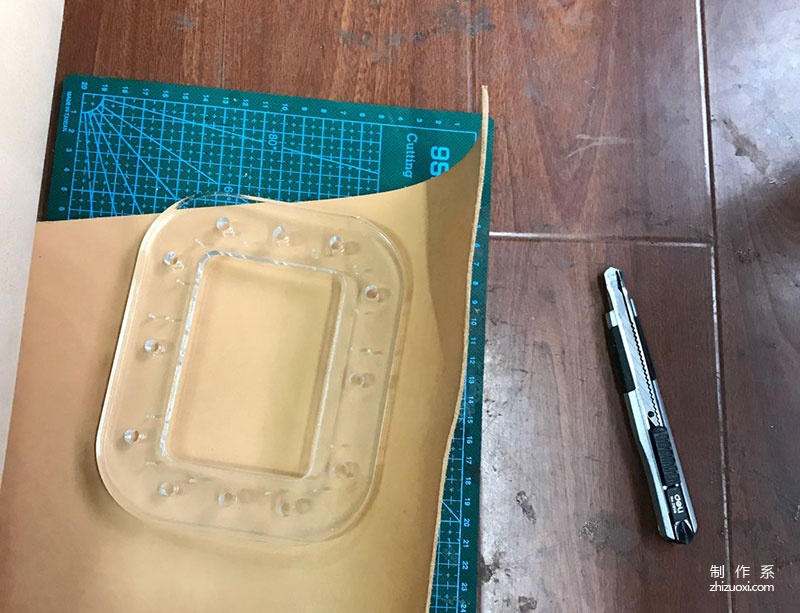
Place the mold on the leather and cut a piece of leather of the same size

Draw the hole position

That’s it!

Use diameter 7mm Use a hole punch to punch holes 2mm-3mm outward, as shown in the picture

Play well

Use a large bucket to soak the skin (you can use warm water)

Stay calm and soak for more than half an hour

Go through, here I have recorded a video
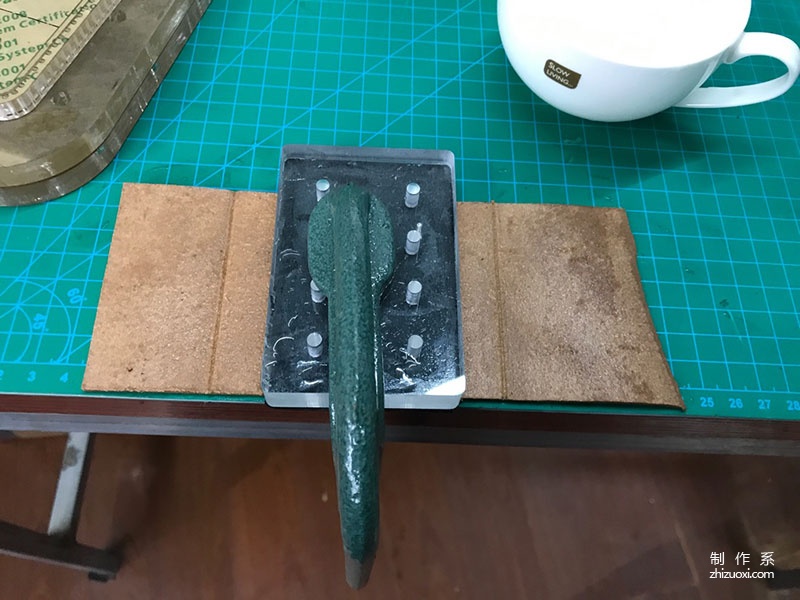
 Fixed
Fixed

Wait for it to dry. You can use a hair dryer, but you cannot blow dry it all at once

After drying, you can remove the mold

The mold needs to be polished and debugged, thank you for your support!

After polishing, Ship after debugging!

Test the inner core !

I made a piece of acrylic with a thickness of 15.5mm, which can be replaced by other ones. It is recommended to use 16mm, which is exactly the thickness of two cigarettes. ,

Grooving It is convenient for bending. Note: thin the lower part of the inner core to about 1.0, so that you can easily put the cigarette.

Soak until soft, then soak with your other half!
Fix it

Bending and shaping, it can actually be folded twice.

Punch holes for easy cutting

Polish the upper opening and seal the edge

The oil is good, just rub it and it will light up

On the other side, many friends said that they need to buy two molds, which can be pressed at one time, but it is best to make one mold. Two sides, 100% symmetrical
 < /p>I like sewing like this, it looks strong like shoelaces!

Try it, it will be better to try it often during the process

If you open the lower mold and it is still a little dry, don't take it all off first, blow it with a hair dryer

Blow the front, don’t be too close, slow down Blow slowly!

The molds for the previous batch of leather friends were finally shipped out today, and there are still 8 sets to be shipped out in a few days. Please wait for me for a few days

Foolproof
Packaging
It is recommended that you start cutting and chopping as soon as it is formed. The leather will shrink if left for a long time. I have it shaped here. It is best to cut one immediately. Remember to mark the lower part inside and write "下", otherwise you will regret it if you don't know the upper and lower parts of the wind

Here we need to use another mold. This mold is very thin. It is best not to knock it. Use a flat plate. Just press it on it and it will be fine as long as there is a mark, otherwise it will be damaged!

My habit is to cut first and then cut the edge to prevent slanting. Here are the following: The turning arc has a circumference of 4mm, but the straight line distance of the cut is 4mm, so You can use 3.0 at the corners. The sewing effect is good!

If there is no 3.0, you can use a chop or chop-type awl to get through it. If it still doesn't exist, you can start from the top midpoint and punch in a circle. The other side must be punched in the opposite direction to achieve alignment. The effect can

I know how to mark when I hit the other side. When I can hit the other side, I will hit it backwards like this. Aligned

Finished

Trimming

I The custom is to only cut one side and cut the other side a little smaller. After it is snug and stitched, the cuts will be neat

The waist cutting is the most difficult, you must be careful

Just cut it like this

My cut is average

After it is formed, you must make a mark on the bottom so that the finished product cannot be seen. When cutting, be sure to look up and down!

Sutures

Continue stitching

Assemble and test, just in case

Not bad! Keep sewing

After suturing, polish the incision< p style="text-align: center;">

Test put down the cigarette, I'm used to testing, and I can correct any problems immediately! Its too late by the time its done

Packed with 15 pieces, put two in two when storing.

If the buckle is not flat , place sandpaper on a flat marble, hold your hands vertically and grind in one direction, then grind in the opposite direction

I am used to applying glue after sewing and then breaking it apart to release the glue.

Flat-nose pliers, Clip it!

Clamp, etc. Dry

Same< p style="text-align: center;">

Place it on the edge of the table Vertical trimming

The technology is limited, but it’s pretty smooth

Polish the seams and save 10,000 words!< p style="text-align: center;">

Finished product! 9pm Click home!

Rendering

The last batch is ready for shipment
 < /p>Polishing and debugging
 < /p>Start packaging
 Tips: You can search Taobao for the acrylic molds you use. I hope you can give me more opinions, exchanges, and improvements!
Cigarette Box


