Author: Flato Before, a long, long time ago... I promised to give a knitting tutorial. Five hundred years later, here I am. I don’t know if it is the first one. If not, I am just trying to do what I want, so please be merciful. What I want to make this time is a short clip with a knitted surface. I made two of them, one with black color matching and one with elephant gray color matching. The elephant gray one was ordered by Xiaonan sister @何小小囡, and it took two months. Finally made it. Now let’s get to the point, how to make a braided short clip that looks reasonable. 1. Special tool Weaving short clips requires the use of a special tool called: braiding chopper. A knitting template will be given as a gift. As shown below.
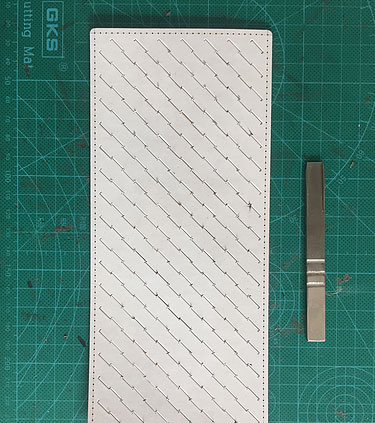
The metal rod above is the braided chopper , the piece of paper below is the template given by Sui Zhan. What I use here is an 8mm braided chopper, you can refer to it. 2. Making the short noodle. Because what I am doing here is color matching, I will directly upload the picture after the color matching.
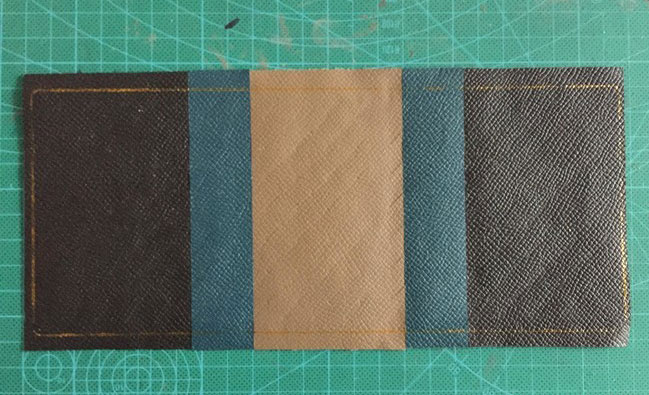
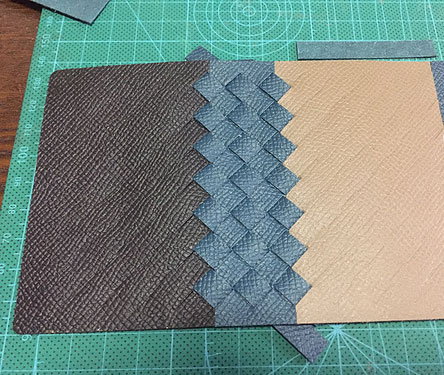
This is what it looks like after spelling .
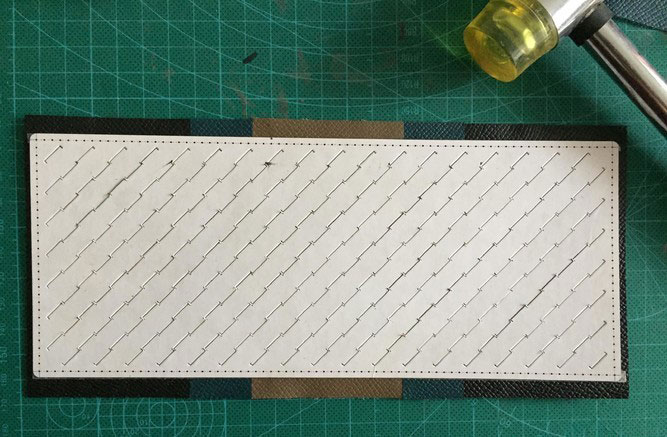
This is what it looks like when killing of. Use double-sided tape on the back, otherwise the template will become useless if it moves. Leather thickness 0.5mm across the board. Otherwise, the effect of editing it will be terrible.
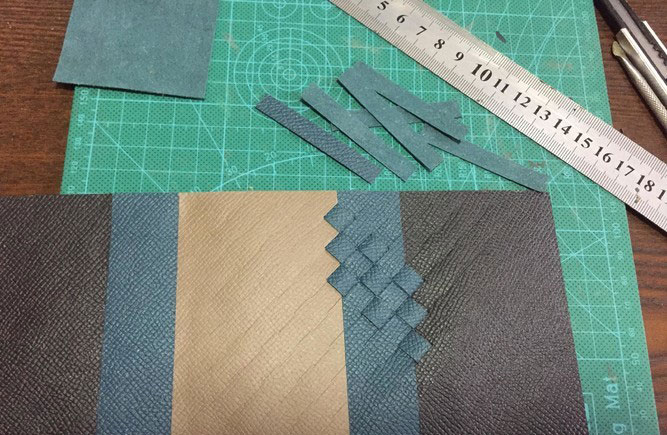
The entire surface is covered After weaving the holes, cut the leather strip to 8mm width and start weaving.
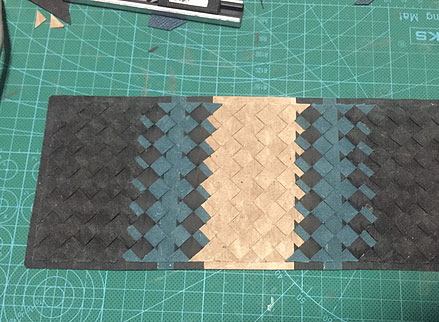

Braid, braid, straight braid, glue the broken joints of the color matching, cut off the excess with scissors, and then glue it, as will be done later There is a detailed explanation.

The overall back Apply glue and cut a piece of second-layer leather that is slightly smaller than the dough to make the cushion. I did not measure the specific size of this template and used it directly. The four sides of the second-layer cushion were indented by 4mm.


Stick it well and tap it firmly with a hammer, it will become purple.
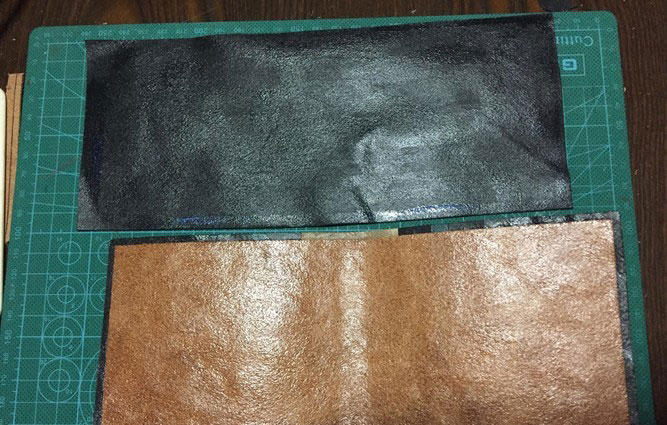
Take a piece of the same 0.5mm epsom leather to make the lining The skin, slightly larger than the outer skin, is bent and sticky, and then the excess area is cut off with a knife.

Use a shaping rod to create a drumming effect. Next, it may cause some discomfort to some viewers, because the following production process involves changing and wrapping. Use this method Make another short spliced ??noodle. (Please note that when making your own, only make oneJust make one noodle. You don’t need to make two noodles. I changed the bag here because the picture at the back was too exciting and I didn’t take a photo.) Using this method, I made another knitted noodle. .

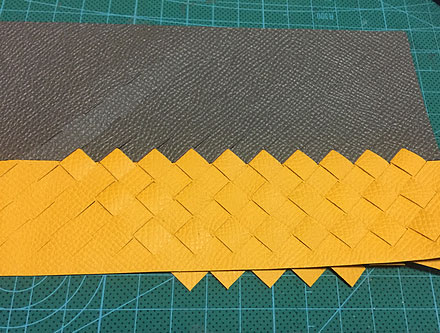

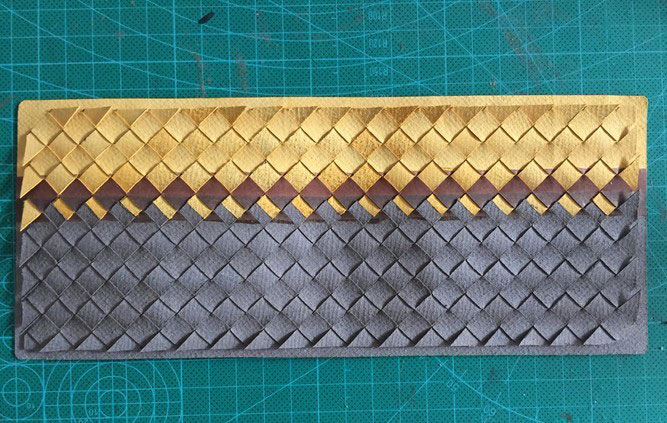


At this point, the production of short clamp noodles is completed. Do you have any questions?Are you dizzy? If you feel dizzy, I suggest you take some motion sickness medicine and continue reading. 3. Weaving details Here, in order to facilitate everyone to understand the details of weaving, a small demonstration was specially made using scraps.


As you can see in the picture above, the holes in the weaving are all It is in the shape of a square bracket, similar to [ ][ ][ ][ ][ ][ ]. The starting point of our weaving is to insert the leather strip from the back of the leather, outside of the square bracket.
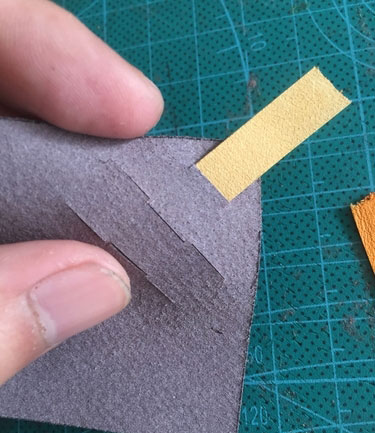
Insert the leather strip as shown in the picture, and then Pimp on the other side. Then insert it in reverse.

Back straightening

And so on
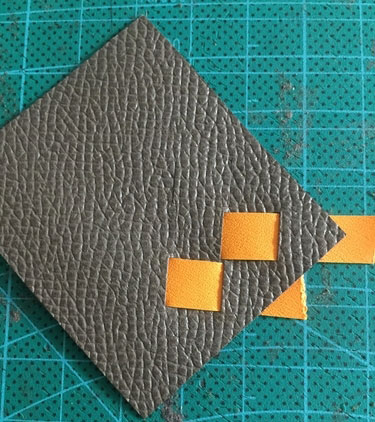

In order to facilitate everyones understanding, I used leather with a large color difference for demonstration. Of course, this A variety of production methods are also possible.
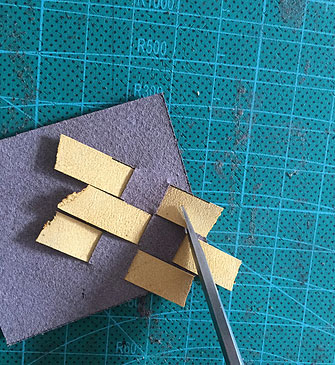
Use scissors to cut off excess leather .
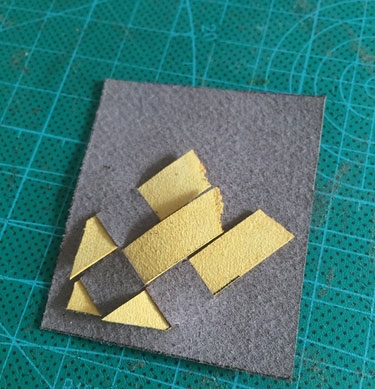

Glue the raised part with glue, and thats it. 4. Production of the card slot for large banknotes. The production process here has been simplified by me, because I have introduced the method of folding and ironing the card slot in my previous article. I will not go into details here, but only briefly introduce the process.


Large note partition x1

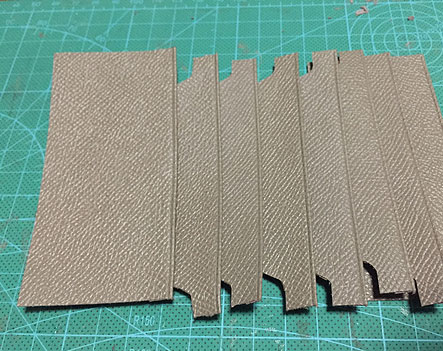
Card position x8 folding and ironing line
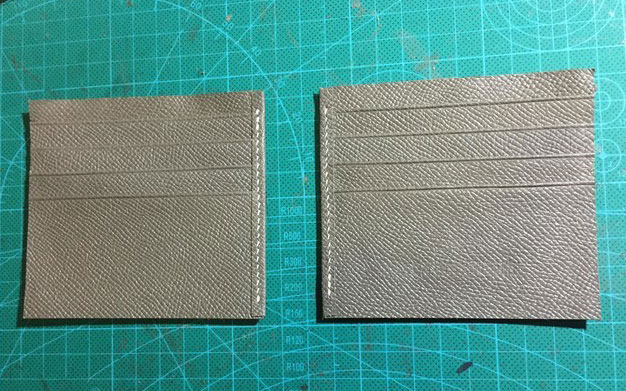
Hemming stitching on the inside of the card slot

The banknote position is aligned with the upper side of the card position and the binding seam is glued.


Then, increase the partition of the banknote position, and at the same time glue it to the dough and sew.
< img src="http://img1.pixiaojiang.com/59f412c9429d57119.jpg-270_f1050.jpg" alt="">


The LOGO of the copper mold involves personal privacy, so I typed a code, don’t scan it, never do it. In the end, I didn’t have time to pose and take makeup photos. These are the only ones~

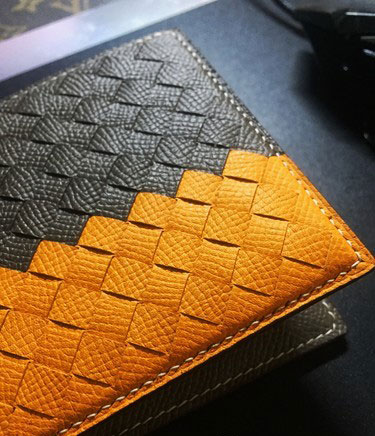
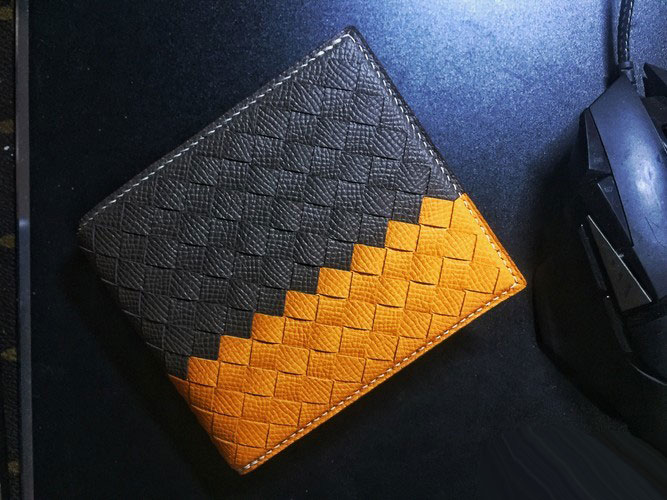
Finally, I would like to thank many worthy friends for their trust, love and support. This series will not be eunuch, so don’t worry. See you in the next issue.
Braided short clip


