Author: Wuzhi WUZHI Taobao store: https://22studio.taobao.com People who buy our material packages are new to the leather industry or trying to make crafts for the first time
Leather goods friends, many friends reported that during the polishing process, they don’t know how much polishing should be done to truly polish the edges of leather goods? There are many tutorials on leather edge banding made by experts on the Internet, but we decided to make an edge banding tutorial that is the most thoughtful and practical for basic user groups. This tutorial does not include the commonly used edge sealing oil/liquid and edge trimmer, because these two are not used highly by friends who are new to the leather pit and those who only purchase product material packages, and their prices are not low compared to other tools. We The different types of sanding paper that are difficult to distinguish and remember are replaced by a double-sided sanding strip, with one side rough and one side delicate, enough to meet basic sanding needs. Of course, the difficulty of polishing is directly related to the quality of the leather. We have always used high-grade first-layer cowhide imported from Italy, so the polishing techniques in this article are limited to the use of our own leather and material packages, or the use of leather materials also imported from Italy. Friends who have seen many edge banding tutorials may find many differences in this tutorial. I hope it can really help everyone~

Tools required: edging rod, sanding strip, bed surface agent, water, wax, cotton cloth, cotton swab, vegetable tanning Skin step 1

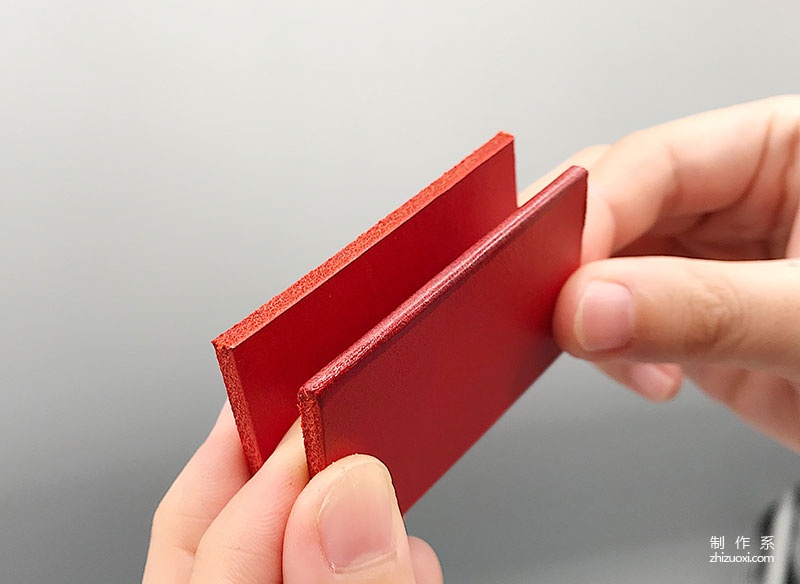
Step 2 Sanding is very important. It is the first step in edge sealing. The smoothness of the sanding directly affects the final effect. The picture is an example of a single piece of leather. The edges are cut very smoothly and the polishing requirement is not very high. , but if the two pieces are polished after pasting during the production process, you need to polish the edges patiently

 < /p> Touch both sides of the sand bar with your hands, select the rough side for polishing, and polish it parallel to the edge cut surface to smooth the uneven areas. Note: Many people reported that the originally smooth cut surface became wrinkled when polished. The layer of debris is not as smooth as before, so I don’t dare to polish it anymore. Don’t worry about this problem. It is normal. After polishing, wipe off the debris with your hands and polish until you can’t feel any obvious unevenness with your fingers. That’s it

Because it is inevitable that the edges of the leather will be warped when sanding, use a sanding bar to polish at a 45° angle to remove the warped edges


Polish it as shown in the picture

Step 3

Then use the fine side of the frosting strip to polish. The polishing method is the same as step2

Just polish it to this level. Step 4


Next, dip a cotton swab in water and apply it evenly on the polished surface Note on the edges: just wet the surface, do not form water droplets

Continue to polish the rough side and fine side of the sand strip, the same as step 2~step 3

Step 5

Moisten the cotton swab with water again

Apply evenly on the polished edge Note: Just wet the surface, do not form water droplets

Step 6

Sand with an edging stick

Since the edges of the leather will inevitably warp when polishing with the edge grinding rod, place the leather on a flat surface and polish in parallel< p style="text-align: center;">

Note: If sanding During the process, if the edge is completely dry, you can add some water to continue polishing, which will make it easier to plasticize

This picture shows the comparison effect of half polishing. Because the leather is of high quality, you can already see the obvious light sensation by simply polishing with water. Step 7


Use an edge grinding rod dipped in bed surface compound to polish

Note: Be careful not to dip in too much bed agent to avoid contaminating the leather surface. If it gets on the leather surface, wipe it off immediately

Apply the bed agent The polishing steps are the same as polishing with water

Step 8
 < /p>After the bed surface agent is polished, apply a layer of wax to protect the edges of the polished leather while further polishing


Step 9

Complete
Edge banding


 < /p> Touch both sides of the sand bar with your hands, select the rough side for polishing, and polish it parallel to the edge cut surface to smooth the uneven areas. Note: Many people reported that the originally smooth cut surface became wrinkled when polished. The layer of debris is not as smooth as before, so I don’t dare to polish it anymore. Don’t worry about this problem. It is normal. After polishing, wipe off the debris with your hands and polish until you can’t feel any obvious unevenness with your fingers. That’s it


 Note: If sanding During the process, if the edge is completely dry, you can add some water to continue polishing, which will make it easier to plasticize


 < /p>After the bed surface agent is polished, apply a layer of wax to protect the edges of the polished leather while further polishing


