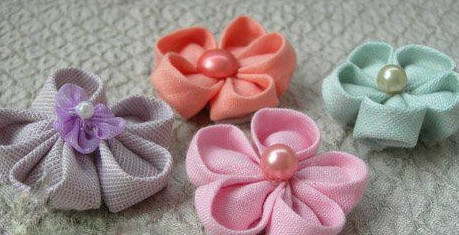
DIY fabric cherry blossom tutorial, how to make fabric cherry blossoms:

Very simple steps:
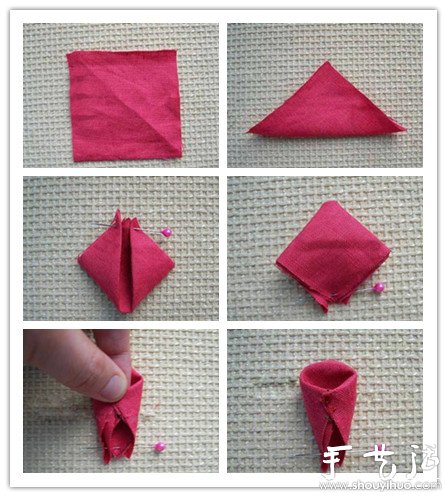
1. 5 pieces of 7cmx7cm cloth (the one used in the picture is linen cloth, the cotton cloth should be thicker, it is best not to use chemical fiber cloth because it is easy to deform);
2. Fold in half into a triangle;
3. Fold both sides of the triangle upward as shown and fix with beads;
4. Turn over to the reverse side and there is a small square;
5. Fold the diagonal corners of the small square inward and pinch;
6. Use needle and thread to sew the diagonal corners together;
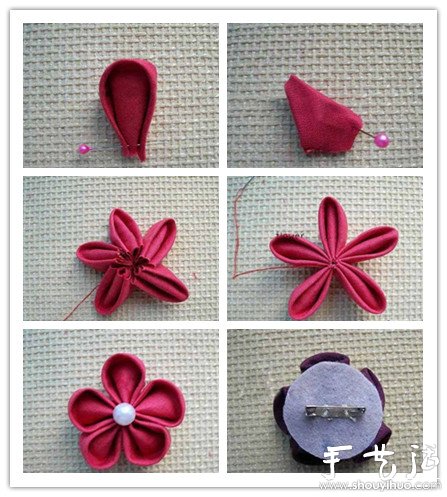
7. Turn it over, the front side looks like this, the natural petals come out;
8. Turn over to the side and cut off the excess fabric at the lower end;
After 9. 5 pieces are completed, use needle and thread to string the petals together;
10. Sew a few more turns to sew the petals tightly together;
11. Sew buttons in the middle to organize the flower shape;
12. The back is a bit ugly, so don’t worry about the final touches;
13. Cut a piece of non-woven fabric and sew it on (the non-woven fabric should not be too big, otherwise the front will be exposed, so it just covers the thread), and sew a pin to form a corsage.


