Home > Origami > Origami basics

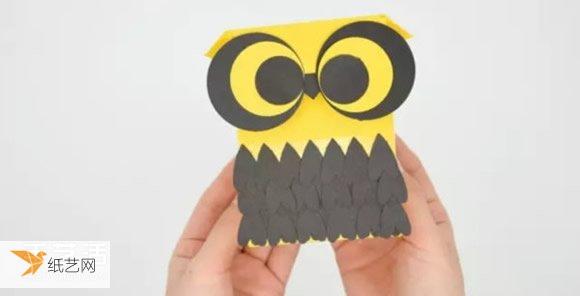
A very simple manual tutorial on how to fold an owl paper bag

A very simple manual tutorial on how to fold an owl paper bag A very simple manual tutorial on how to fold an owl paper bag

A very simple manual tutorial on how to fold an owl paper bag

I don’t know since when, the shape of the owl has been very popular and can often be seen in handmade works.

The following mainly introduces the tutorial for making this owl paper bag.

A very simple manual tutorial on how to fold an owl paper bag

A very simple manual tutorial on how to fold an owl paper bag

Prepare wrapping paper, cardboard, double-sided tape and punch holes in advance device.

First make the paper bag. The whole process requires the help of double-sided tape. It is very simple to make.

A very simple manual tutorial on how to fold an owl paper bag

A very simple manual tutorial on how to fold an owl paper bag

A very simple manual tutorial on how to fold an owl paper bag

A very simple manual tutorial on how to fold an owl paper bag

A very simple manual tutorial on how to fold an owl paper bag

A very simple manual tutorial on how to fold an owl paper bag

A very simple manual tutorial on how to fold an owl paper bag

< p style="text-align:center;">A very simple manual tutorial on how to fold an owl paper bag

A very simple manual tutorial on how to fold an owl paper bag

A very simple manual tutorial on how to fold an owl paper bag

After the paper bag is made, start Make an owl.

Cut a corner from the black cardboard and paste it directly on the front of the paper bag. It can be used as the mouth of the owl.

A very simple manual tutorial on how to fold an owl paper bag

A very simple manual tutorial on how to fold an owl paper bag

A very simple manual tutorial on how to fold an owl paper bag

A very simple manual tutorial on how to fold an owl paper bag

A very simple manual tutorial on how to fold an owl paper bag

Such a large circle can be seen as the iconic eyes.

Then stick a lot of double-sided tape under the eyes.

< p style="text-align:center;">A very simple manual tutorial on how to fold an owl paper bag

A very simple manual tutorial on how to fold an owl paper bag

Use a hole punch to make a lot of hearts and paste them on the double-sided tape.

A very simple manual tutorial on how to fold an owl paper bag

A very simple manual tutorial on how to fold an owl paper bag

A very simple manual tutorial on how to fold an owl paper bag

In this way, the owls wings will It’s done. I don’t know if you have noticed that there is a big gap between the top wings.

A very simple manual tutorial on how to fold an owl paper bag

A very simple manual tutorial on how to fold an owl paper bag

A very simple manual tutorial on how to fold an owl paper bag

A very simple manual tutorial on how to fold an owl paper bag

In fact, it doesn’t matter at all, just sprinkle some glitter powder to block it.

A very simple manual tutorial on how to fold an owl paper bag

A very simple manual tutorial on how to fold an owl paper bag

A very simple manual tutorial on how to fold an owl paper bag

 The wings also need to be glued on the owls back, and a very cute owl paper bag is ready.