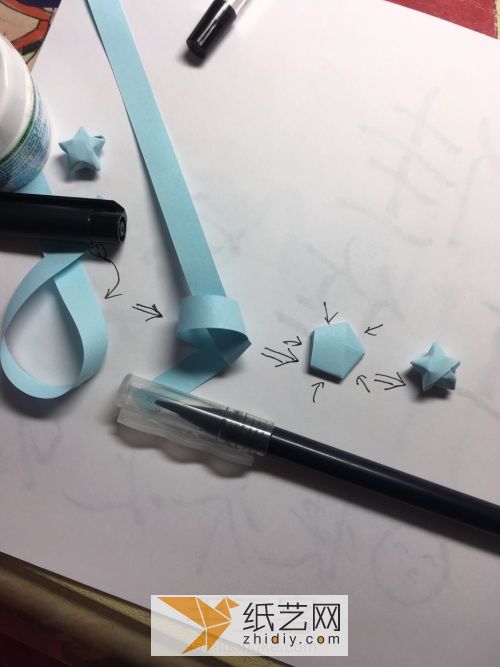
I don’t know if you have learned the basic folding method of making origami lucky stars. I guess most people have, especially those who are fans of hand-made origami or those with strong hands-on skills. For the origami lucky stars, The production is certainly quite familiar. However, the tutorial on how to make origami lucky stars is still very challenging for many students, especially those who have never tried folding origami lucky stars before. Although they have always wanted to try how to make origami lucky stars, it is because the tutorials are not enough. I didn’t really try it due to reasons of clarity or lack of time. Fortunately, here is another beautiful, simple, and clear tutorial for making hand-made origami lucky stars. This greatly facilitates everyone’s learning and making. , so that every student who likes hand-made origami can complete the folding and making of the origami lucky star by himself.
The tutorial on folding and making the hand-made origami lucky star still uses illustrated tutorials to show how to fold and make the hand-made origami lucky star. I believe everyone is familiar with this. In the specific process of learning origami lucky stars, the main thing you need to prepare is the long paper strips you see here. This is very important, because the production of origami lucky stars is completed by long paper strips. . In order to make the final origami lucky star different from others, the maker of the tutorial here created a structure similar to the colorful rainbow in the color combination of the origami lucky star, which greatly increased the quality of the entire craft. The beauty of the production, I believe you will also like this creative way.
Step 1:

The materials are here!
Step 2:

Step 3:

Light blue star paper (can Use quill paper instead)
Step 4:

Teach children who don’t know how to fold lucky stars (1-2 steps to make paper knots and fold... ...The third step is to pinch in five directions...)
Step 5:

Fold a bunch
Step 6:
p>
Put it in (it seems not enough)
Step 7:

+4 It must be a full layer
Step 8:

Make a variety of colors, layer them up, put them in bottles and cap them with corks!
Tutorial In order to make the origami lucky stars she designed look different from other peoples origami lucky stars, a clever idea is to layer the completed origami lucky stars in different colors so that they look like The overall production effect of the handmade origami lucky star is even more beautiful. Of course, this is also inseparable from the exquisite glass bottle itself. The glass bottle can be used as a small yogurt bottle, which I believe everyone has at home.


![[Origami Encyclopedia] Creative handmade origami video tutorial on origami Apple LOGO](https://img.111diy.com/timthumb.php?src=/d/file/20220217/dd2zin3tlq5.jpg&w=200&h=200&zc=1)

![[Complete Fish Origami] Carp Origami Illustrated Tutorial](https://img.111diy.com/timthumb.php?src=/d/file/20220217/crxjaul5f53.jpg&w=200&h=200&zc=1)


