Tutorial on how to make a small origami building for children Have you tried it? If you haven’t tried it before, you can take a look at this tutorial on how to make a small origami building for children. The tutorials on how to make a small origami building for children that we shared before were all presented in the form of a simple drawing. It seems that the students have a little trouble learning. Difficulty, for example, I don’t know how to fold some key steps. After all, not all students are good at origami, so we still need some simpler tutorials to help everyone complete the production. We saw this handmade origami here. This tutorial on making a small origami building for children is a tutorial on making origami illustrations, that is, what are the benefits of using real-life photos to show them?
Real-life pictures make it easier for everyone to learn better. Real-life pictures can show some details. Real-life pictures allow us to more easily grasp some places that we cannot learn by ourselves when we are studying in the tutorial. In fact, during the production, you can see that there is no difficulty in making this small origami building for children. It is basically done through simple origami methods, but it can help us learn some important and very valuable folding techniques. Methods, these formulation methods can be applied to other origami production processes we learn later. Such a simple and interesting origami tutorial can enhance our hands-on ability, allow us to gain happiness in the hands-on process, and also gain some interesting small productions. The simple and interesting origami house making tutorial allows students who like crafts to learn an interesting making method.
Step 1:

Square paper
Step 2:

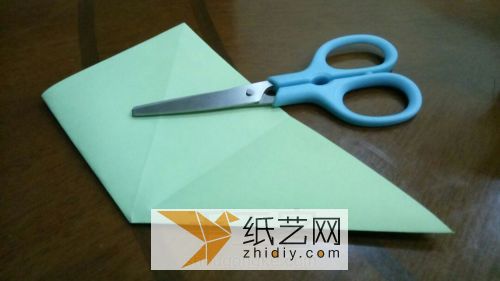
Fold in half into a triangle
Step 3:

Fold any side upwards [scissors] It is used to hold it down]
Step 4:

Turn over
Step 5:

Fold the other side up< /p>
Step 6:

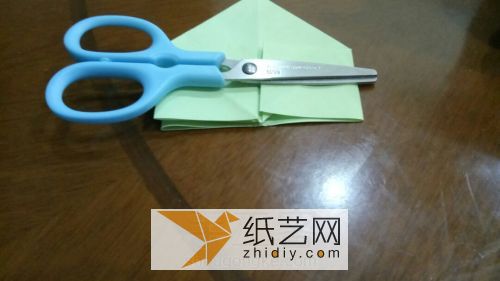
The paper clip is just for taking pictures, and the scissors are opened
Step 7:

Into a double triangle
Step 8:

Fold both sides upward
Step 9:

Turn over
No. 10 Steps:
Fold again ,,,
Step 11:

Open the tip of the scissors into a small square on the left
Step 12:

Clamped with paper clips, fold to the right
Step 13:

Flip
Step 14:

Fold the paperclip to the right
Step 15:

Fold both sides toward the middle to form the left side
Step 16:

Paper clips held between Fold left
Step 17:

Flip
Step 18:

Fold the paperclip to the left
Step 19 :

Fold into sauce purple
Step 20:

Open the tip of the scissors and flatten it
Step 21:
p>
Fold it to the left side
Step 22:

Tidy it up
Step 23:

Paper clip clip Fold upwards
Step 24:

Flip
Step 25:

Pinch it with paper clips and fold it upward
Step 26 :

Complete


![[Origami Encyclopedia] Creative handmade origami video tutorial on origami Apple LOGO](https://img.111diy.com/timthumb.php?src=/d/file/20220217/dd2zin3tlq5.jpg&w=200&h=200&zc=1)

![[Complete Fish Origami] Carp Origami Illustrated Tutorial](https://img.111diy.com/timthumb.php?src=/d/file/20220217/crxjaul5f53.jpg&w=200&h=200&zc=1)


