Practical origami for many hand-made origami hobbies For readers, it is definitely very attractive. This is because the use of origami can not only help us make some very practical small objects in our daily life, but we can also exercise our hands during the production process. ability. The user-made tutorial we recommend today is to teach you how to make an origami envelope. Since this is a tutorial for this envelope, after completing the folding, what we should get is an origami envelope. From the completed renderings, we can see that the effect of this origami envelope is still very good, especially this hand-made origami envelope. The structure is very different from some intellectual styles we have seen before, but this envelope is very beautiful when made. If you are looking for a completely different origami envelope making tutorial, then my step-by-step tutorial on hand-made origami will definitely help you make a beautiful hand-made origami envelope. You will definitely ask, what role can this new trend play? We can teach us how to make good handmade greeting cards, knowing that the inside of the envelope actually brings a beautiful packaging to the handmade greeting cards, so that when we give away our handmade greeting cards, we don’t have to worry about them looking shabby after the wedding. At the same time, we can also put some important documents into our origami envelopes in our daily life, thereby playing a role in saving files. In fact, some attempts in this area are definitely familiar to everyone, especially in our daily life. There are some small letters or documents in life that can be placed directly into the origami envelopes we have completed.
Step 1:

Step 2:< /p>

Step 3:

Get ready to start!
Get it first Make a big square!
Step 4:

Rotate!
Step 5:

After folding in half on the horizontal center line Expand!
Step 6:

Fold the lower corners upward!
Step 7:

Flip up again Fold!
Step 8:

Fold the left and right inwards!
Step 9:

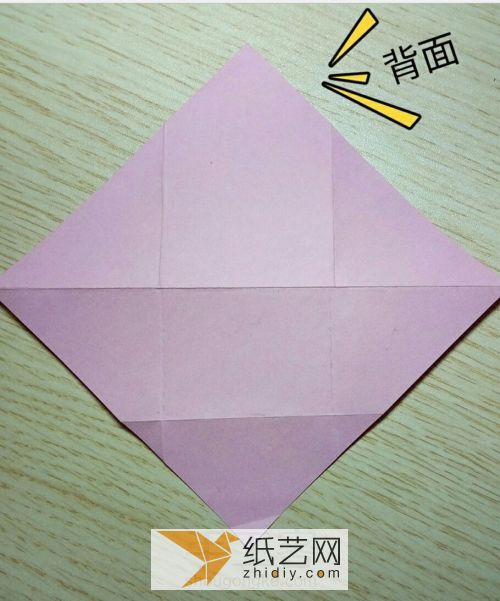
Expand it first! This is the front rendering!
Step 10:

Turn over!
Step 11:

Take it out and get ready A small square!
Step 12:

Use double-sided tape to stick to the leftmost 1/4!
Step 13:
p> < /p>
< /p>
Turn back to the front!
Step 14:

Fold it out again according to the previous steps!
Step 15:
p> < /p>
< /p>
Fold the left corner of the first layer to the right!
Step 16:

In the previous step, fold to the right part and start from the middle gap Expand!
Step 17:

The folding is complete!
Fold the top corners down and insert them into the small diamond shape!
Step 18:

If you are already interested in this If you are interested in making origami envelopes by hand, you can now pick up the paper at hand and fold it without knowing it. Because this origami envelope folding and making tutorial is shown on a rental basis, it will feel more comfortable to learn with you. Easy to get started.


![[Origami Encyclopedia] Creative handmade origami video tutorial on origami Apple LOGO](https://img.111diy.com/timthumb.php?src=/d/file/20220217/dd2zin3tlq5.jpg&w=200&h=200&zc=1)

![[Complete Fish Origami] Carp Origami Illustrated Tutorial](https://img.111diy.com/timthumb.php?src=/d/file/20220217/crxjaul5f53.jpg&w=200&h=200&zc=1)


