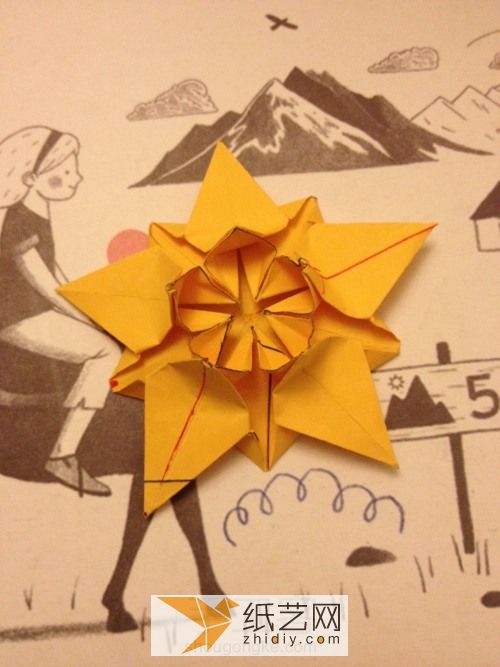
You have seen the illustrated tutorials on origami cherry blossoms and how to make origami hearts, but have you ever tried the origami cherry blossom stars? We can see from this origami rendering that the difficulty of origami cherry blossom stars is indeed relatively high. The effect of the origami cherry blossoms displayed will be very beautiful, but it is conceivable that the production process must be relatively complicated. In reality This is indeed the case. Although the entire process of this origami cherry blossom illustrated tutorial is relatively clear, there are really many steps. If you don’t have enough patience, it is really difficult to make this beautiful and interesting origami cherry blossom star. .
Step 1:

Let’s take a look at the finished picture of this origami cherry blossom star first!
Step 2:

First use a square piece of paper to make a pentagonal paper
Step 3:

Like this Fold the paper in half
Step 4:

The crease is drawn here, that is, fold the lower left corner upward
Step 5:

Fold the upper left corner downward again
Step 6:

Fold the lower right corner to the point where the two previous creases meet.
Step 7:

Fold this corner to the right crease
Step 8:

Turn over to the back
Step 9:

Open this fold
Step 10:

Fold the right side to the left according to the position of the red line
No. 11 steps:

It’s folded like this
Step 12:

Continue to fold the folded edge back to the crease
No. 13 Step:

Fold it in half like this< /p>
Step 14:

Look at it from above
Step 15:

Cut off the top along this line
Step 16:

A small triangle is left
Step 17:

When you open it, it will be a pentagonal paper
Chapter 18 Steps:

Fold it like this
Step 19:

Fold the sharp corners to the bottom edge
Step 20:

Open it, and then fold the sharp corners to the crease in the previous step
Step 21:

Pay attention to the three points drawn
Step 22:
Fold the right edge to the point like this
Step 23:

The crease passes through two points
Step 24:

Open all
Step 25:

Find the small pentagon inside, and then continue folding
< p>Step 26:Continue folding like this
Step 27:

Fold the edges together and it will look like this
Step 28:

Fold it along and you're done
Step 29:
Open the position pointed by the bamboo stick
Step 30:

Fold it flat like this
Step 31:

Fold the outer part like this too
Step 32:

Now let’s make the part where the bamboo stick points, and draw the crease with black lines
< p>Step 33:Fold it like this
Step 34:

The effect is the same as the previous one, folded like this
No. 35 Steps:

Open the small corners in the middle
Step 36:

Fold both sides to the middle
Step 37:

Press again and fold each part like this
Step 38:

Turn over to the other side
Step 39:

Step 40:

Then fold these corners inward
Step 41:

After folding, this is the effect
Step 42:

Turn over again
Step 43:

Fold the sharp corners inward
Step 44 :
 < /p>
< /p>
Folded
Step 45:

Pull up the middle one and it will become an origami cherry blossom star! Fortunately, this origami cherry blossom star is really beautiful. I believe this beauty can also be a motivation for you to learn this hand-made origami cherry blossom heart-shaped illustration tutorial. This is also a very beautiful one in our origami encyclopedia. Some of the previous origami productions It is rare to see such beautiful origami making. This also makes many of us beginners of manual origami eager to try. We hope to use this illustrated tutorial of manual origami to make beautiful origami cherry blossom stars by ourselves.


![[Origami Encyclopedia] Creative handmade origami video tutorial on origami Apple LOGO](https://img.111diy.com/timthumb.php?src=/d/file/20220217/dd2zin3tlq5.jpg&w=200&h=200&zc=1)

![[Complete Fish Origami] Carp Origami Illustrated Tutorial](https://img.111diy.com/timthumb.php?src=/d/file/20220217/crxjaul5f53.jpg&w=200&h=200&zc=1)


