Origami is not only used to make decorations In addition, the car itself is actually a unique technology. This unique technology can bring a lot of fun to our lives and enrich our daily lives. When I say this, you will definitely feel confused. Why is origami an important life skill? In fact, we use origami inadvertently in our daily lives. Maybe we don’t know it, but the origami skills are used. Here I recommend a manual illustrated tutorial for you. This manual illustrated tutorial also teaches you how to make origami. However, unlike the traditional manual origami tutorial, this manual origami tutorial actually improves our skills in daily life, and also It teaches us how to use origami to better enrich our lives.
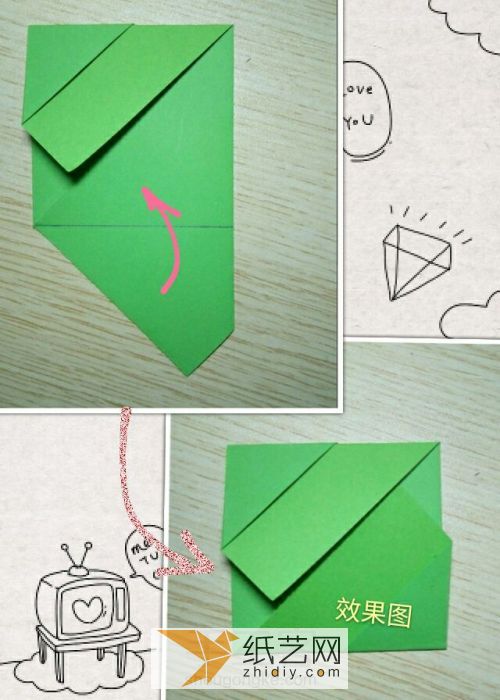
You can see this manual origami tutorial to teach you how to learn a fancy stationery. The so-called fancy stationery means that after we finish writing the letter, we need to perform a simple folding of the nature, so that the stationery looks very beautiful. Complete, or the package feels very good. At this time, we can use the fancy letter paper method to complete the folding of the letter paper! This illustrated tutorial on hand origami will teach you how to fold the letter paper in a good way after writing it. You may say that not everyone can fold letter paper, but the properties you can see in this tutorial are the same as those in this tutorial. The letter paper that I teach you to fold will definitely be completely different.
Step 1:

Step 2:

No. 3 Steps:

Step 4:

Step 5:
p> < /p>
< /p>
Step 6:

Step 7:

Step 8:

Step 9:

Step 10:< /p>

Step 11:

Step 12:
< p>
Step 13:

Step 14:

< br/>
Step 15:

This is interestingThe small manual origami tutorial can indeed enhance our daily hands-on ability, and the stationery folded in this way may be very interesting when the students unfold it after receiving your letter! If you are a fan of making fancy letter paper origami, then this handmade illustrated tutorial should be something you have never seen before. After all, this is a very novel handmade origami illustrated tutorial. You can save this tutorial and start Learn how to fold a new fancy stationery.


![[Origami Encyclopedia] Creative handmade origami video tutorial on origami Apple LOGO](https://img.111diy.com/timthumb.php?src=/d/file/20220217/dd2zin3tlq5.jpg&w=200&h=200&zc=1)

![[Complete Fish Origami] Carp Origami Illustrated Tutorial](https://img.111diy.com/timthumb.php?src=/d/file/20220217/crxjaul5f53.jpg&w=200&h=200&zc=1)


