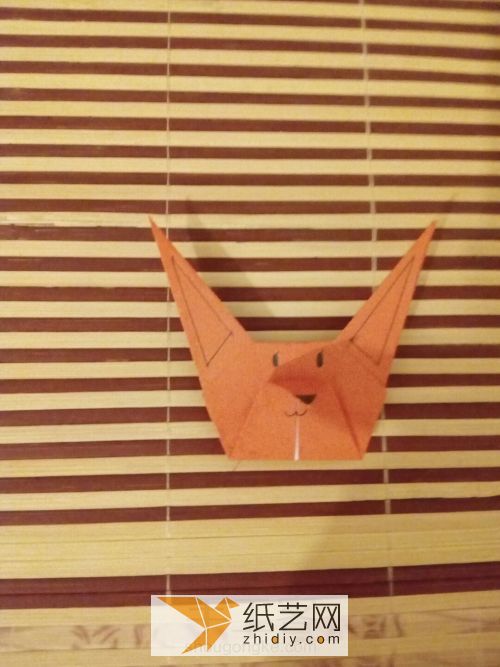
 Simple and cute children’s handmade origami fox making tutorial
Step 1:

Square colored paper is used to make origami little foxes
Step 2:

Make all the folds
Step 3:

Then fold both sides of the corners to the middle crease
Step 4:

The four sides must be folded like this
< p>Step 5:
Open
Step 6:

Then fold it according to the crease, and it will look like a square when viewed from the front
Step 7:< /p>

Then fold the edges inside, all according to the crease
Step 8:

Fold both sides to the top< /p>
Step 9:

Thats it
Step 10:

Then fold the front and back in half to get this effect
Step 11:

Fold the corners to this position
Step 12:

Fold it again
Step 13:

Point the top Pull the pointed ears apart
Step 14:

Fold the middle corner to the back
Step 15:

Get your pen ready to draw
Step 16:
p>
Step 17:

Draw the mouth again
Step 18:

In this way, the origami fox Folding the ears is also very cute
Step 19:

Learning to make origami fox, especially for children, you should not underestimate the whole folding process, from the origami operation , we can see that the processing of pre-folding is an inevitable step for this hand-made origami fox. For students who like hand-made origami and hope to further improve their level, this tutorial can be of great help. of. Learning how to make such a hand-made origami fox can help children better understand how the structure of origami changes during the shaping process, and how they can ultimately obtain the style they want and need. Such a hand-made origami little fox The production of the fox can be combined with the production of other childrens origami animals that we have learned before to form a perfect small zoo structure.
Main material: colored paper, Tools required: ruler, pen,

![[Complete Fish Origami] Carp Origami Illustrated Tutorial](https://img.111diy.com/timthumb.php?src=/d/file/20220217/crxjaul5f53.jpg&w=200&h=200&zc=1)
![[Origami Encyclopedia] Creative handmade origami video tutorial on origami Apple LOGO](https://img.111diy.com/timthumb.php?src=/d/file/20220217/dd2zin3tlq5.jpg&w=200&h=200&zc=1)


