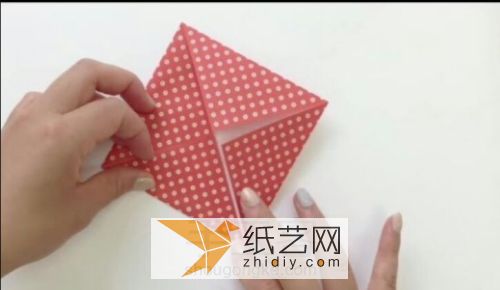
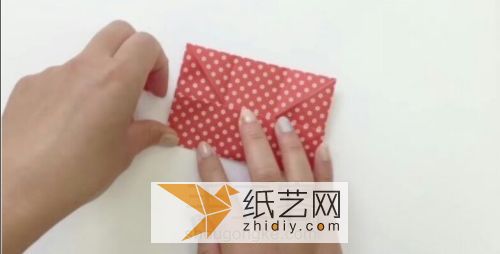
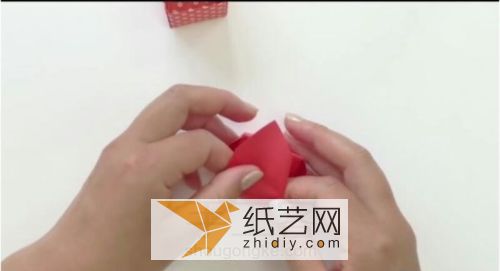
In the production of origami fruits and vegetables, We learned some simple origami ideas such as origami apple origami peach origami pear. Although these origami productions are very simple and very interesting, one thing we should notice is that the tutorials for making origami fruits and vegetables are all flat, that is, the origami food itself is displayed flat and looks like nothing. Three-dimensional feeling. This kind of folding creativity without a three-dimensional sense is definitely difficult to meet everyones needs. Many students still hope to make some origami with a three-dimensional sense, especially in the process of making origami fruits and vegetables. If they can fold three-dimensional origami The appeal of creativity is still very strong, so what we recommend here is a hand-made origami with a good three-dimensional effect. We can see that this hand-made origami tutorial teaches you to make a three-dimensional origami tomato. Although it is not as round as a real tomato, this cubic folding creative performance is also very exciting, especially for students who like modular origami production, the folding performance of a square is also satisfactory. . The most important thing is that the production of this hand-made origami is not complicated, because it decomposes the entire origami model accordingly, so it will be very easy for us to fold it. At the same time, this is a tutorial for making a small box. That is to say, it is a tutorial on how to make a hand-made origami storage box. So while we are learning this hand-made origami tomato, we can also learn how to fold an origami small box or an origami storage box. This can be convenient. We put gifts in them and then give them to our friends, which can bring a surprise in itself. If you want your handmade origami tomatoes to look more like handmade apples, then you can choose green paper for folding. If you want your origami tomatoes to look more like origami pears, you can choose yellow paper for folding.
Step 1:

Step 2:< /p>

Step 3:

Step 4:

Step 5:

Step 6:

Step 7:

Step 8:

Step 9:

Step 10:

Step 11:

Step 12:

Step 13:

Step 14:

Step 15:

Step 16:

Step 17:

Chapter 18 Steps:

Step 19:

Step 20:
p> < /p>
< /p>
Step 21:

Step 22:

Step 23:

Step 24:

Step 25:

Chapter 26 Steps:

Step 27:

Step 28:
p> < /p>
< /p>
Step 29:

Step 30:


![[Origami Encyclopedia] Creative handmade origami video tutorial on origami Apple LOGO](https://img.111diy.com/timthumb.php?src=/d/file/20220217/dd2zin3tlq5.jpg&w=200&h=200&zc=1)

![[Complete Fish Origami] Carp Origami Illustrated Tutorial](https://img.111diy.com/timthumb.php?src=/d/file/20220217/crxjaul5f53.jpg&w=200&h=200&zc=1)


