When we learn to make origami flowers, we often try some complicated origami flowers. This is mainly because the patterns displayed by complex origami flowers are more beautiful. Many students also prefer to make complex origami flowers. Learn the general method of making origami flowers or the fragrance making techniques of origami flowers that others may not tell you, but the illustrated tutorial of handmade origami flowers that we recommend to you shows a simple little How to fold origami flowers? From the renderings of the completed origami flowers, we can clearly see that the overall three-dimensional structure of this three-dimensional origami flower is very good. Although it is a very simple hand-made origami flower, it is also the same It perfectly expresses the three-dimensional structure of the three-dimensional origami flowers, which also makes everyone more enthusiastic when learning, because when we see such exquisite renderings, we definitely can’t help it. I just want to fold this origami flower out.
Step 1:

Look at the completed origami flower first
Step 2:

Beautiful origami flowers
Step 3:

First fold the square paper in half on the opposite sides and diagonal corners
Step 4:

Fold the lower edge to the middle
Step 5:

Press the crease on the marked part at the bottom
Step 6:

The crease is this black line
Step 7:

Press the creases in all four directions
Step 8:

Fold into a triangle according to the crease
Step 9:
p>
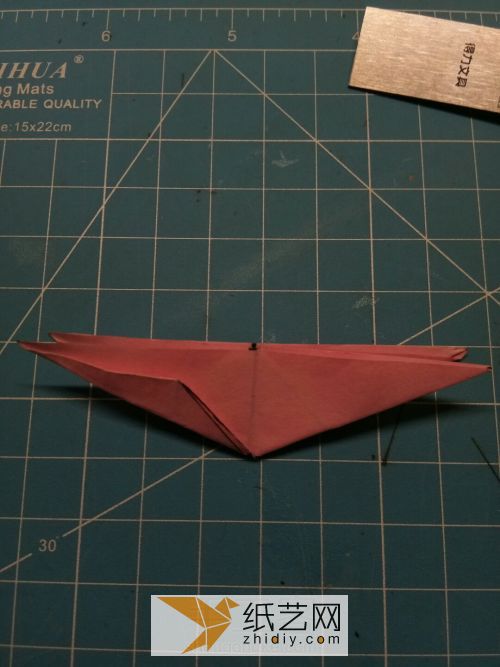
Then fold the middle part according to the crease of the middle square
Step 10:

Find these creases and fold them
Step 11:< /p>

Step 12:

This is what an origami trapezoid looks like
Step 13:

Fold according to the drawn position
Step 14:

Fold it like this
Step 15:

Fold several parts equally
Step 16:

Four corner supports Open
Step 17:

Then unfold both sides
Step 18:

After doing this
Step 19:
p>
Open all four petals
Step 20:

Fold the edge of this position and stand it up
Step 21:

Then this origami flower Its quite three-dimensional
Step 22:

Turn over to the back, apply glue to the blackened area
Step 23:

This is solid
Step 24:

The back is like this
Step 25:

The following is to adjust the shape
Step 26:

stamens The position needs to be folded like this
Step 27:

Then you can bend the petals downward
Step 28:

The beautiful origami flowers are completed
Step 29:

You can do it without glue. This is how the middle of the petals is treated
Step 30:

Origami flowers like this are also very beautiful< /p>
Step 31:

You can see this origami flower from the sentence of completed production. From different angles, the color effects are completely different. How can we achieve such a very unique origami flower? What about good-looking effects? This requires us to choose the right paper when folding. That is to say, the color of the paper needs to match the folding and production of the hand-made origami flower. But when the paper color we choose is very good, the origami flower can show such a beautiful three-dimensional folding effect. Because we adopt the three-dimensional origami production method, the three-dimensional structure itself can also make full use of the color characteristics of the paper, thus ultimately making your handmade origami flowers look better and more structurally beautiful.


![[Origami Encyclopedia] Creative handmade origami video tutorial on origami Apple LOGO](https://img.111diy.com/timthumb.php?src=/d/file/20220217/dd2zin3tlq5.jpg&w=200&h=200&zc=1)

![[Complete Fish Origami] Carp Origami Illustrated Tutorial](https://img.111diy.com/timthumb.php?src=/d/file/20220217/crxjaul5f53.jpg&w=200&h=200&zc=1)


