Among the childrens handmade origami production, the origami of small animals is the most popular among students. Many children prefer folding ocean animals, mainly because ocean animals are easier to fold, and the origami ocean animals produced are It also gives us the feeling of swimming in the sea. Here you will learn the illustrated tutorial of this ocean origami animal, which teaches you to use square paper to fold a lifelike origami seal. This handmade origami seal is from the renderings. It may not seem that amazing, but when you learn how to make this small origami poster by following the manual origami illustration tutorial, and fold the little origami seal by yourself through the folding method, you will find that this little origami seal is still very beautiful. !
Step 1:

Use squares of colored paper to make origami seals
Step 2:

Fold the paper in one direction like this Equal parts
Step 3:

Fold the corners on both sides to the middle
Step 4:

Fold the top two corners
Step 5:

Then open these two corners
Step 6:

Open the square where the crease is located
Step 7:
The whole thing is folded like this
Step 8:

That’s it
Step 9:
< p>
Also The horns are also folded like this
Step 10:

Then fold the two lower corners up
Step 11:

The purple side looks at Not sure, let’s change to the white side
Step 12:

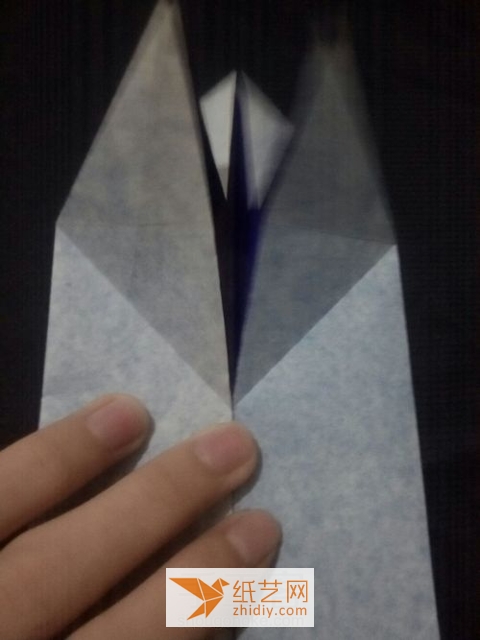
This will open the corner
Step 13:
< img alt="Origami Seal Making Tutorial in Animal Origami Encyclopedia" src="https://img.111diy.com/timthumb.php?src=/d/file/20220222/hdhpxkrqk03.jpg" />
This is the folding method
Step 14:< /p>

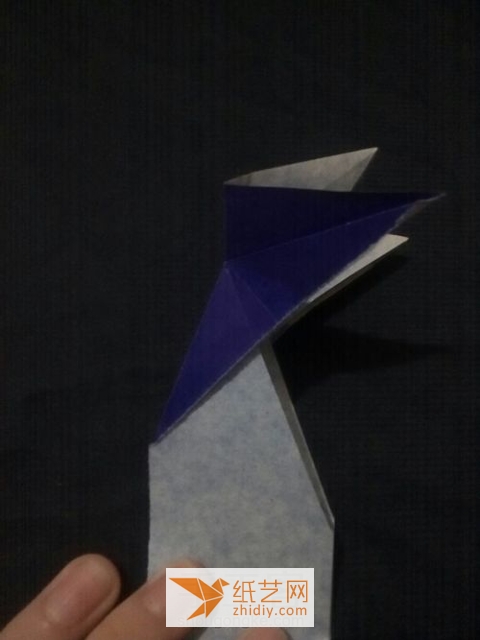
Fold the horns down again
Step 15:

Fold the corners on both sides
Step 16:

Turn over
Step 17:
Fold both sides to the middle
Step 18:

Turn over to the other side
Step 19:
p>
Step 20:

Fold it in half
Step 21:

Fold the upper corners like this
Step 22:

Then fold it inward
Step 23:

Continue folding in this way
Step 24:

Open this part< /p>
Step 25:

Then fold it
Step 26:

Fold the lower corners up in this way
Step 27 :

It’s folded like this
Step 28:

The corners on the other side should also be folded in this way
Step 29:

Open the above section
Step 30:
Then fold it again
Step 31:

Fold it like this
Step 32:
< p>
See The folding position is below
Step 33:

Fold it again like this
Step 34:

Fold the lower part up
Step 35:
Then continue folding
Step 36:

This is the upper corner part opened and folded
No.Step 37:

Fold the other side in the same way
Step 38:

The head position is folded
Step 39:

Then the entire paper underneath is opened as a rock
Step 40:

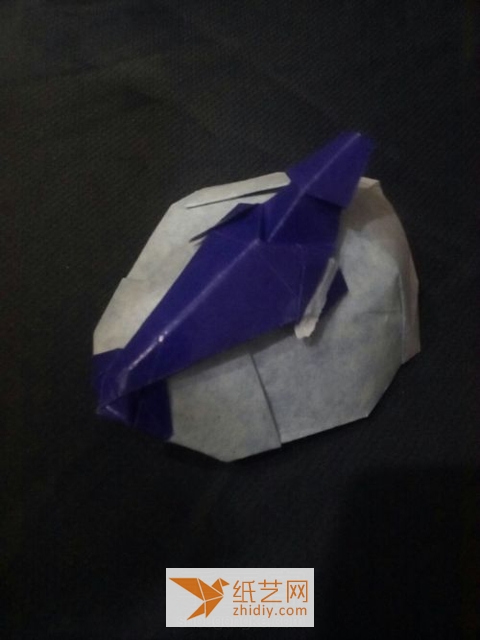
This looks like a baby seal lying on the rock
Step 41:< /p>

Our previous inherent concept is that the folding shapes made by childrens origami are usually relatively poor in simulation. This concept should be dispelled in this tutorial on making small hand-made origami posters for children. Mainly because we can see that the manual origami illustration tutorial shows in detail how such a childrens origami baby seal, which is very realistic and three-dimensional, is carefully and carefully folded step by step, and finally looks like a real seal. The effect is good, and children can also realize the importance of protecting small animals and protecting nature from such hand-made origami illustration tutorials.


![[Origami Encyclopedia] Creative handmade origami video tutorial on origami Apple LOGO](https://img.111diy.com/timthumb.php?src=/d/file/20220217/dd2zin3tlq5.jpg&w=200&h=200&zc=1)

![[Complete Fish Origami] Carp Origami Illustrated Tutorial](https://img.111diy.com/timthumb.php?src=/d/file/20220217/crxjaul5f53.jpg&w=200&h=200&zc=1)


