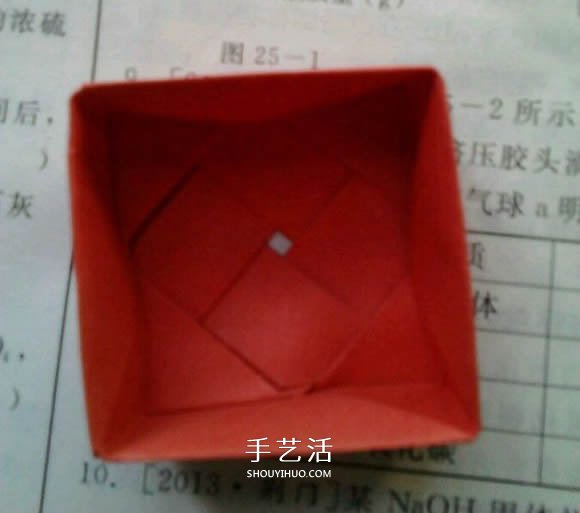
The origami tutorial of the beautiful Rose of Versailles box has many steps and is divided into three parts: the flower, the box body and the bottom. Friends who like it should keep their eyes open and take a closer look (^o^)/~< /p>

Prepare 12 pieces of square paper. In order to let everyone see clearly, three different types of paper are used to fold different parts.

First, fold the roses.

Prepare a piece of paper.

Fold it in half, leaving a small crease (don’t fold it all, just the black line, the length is customizable, it doesn’t have to be very long).

Then fold like this.

Turn over.

Fold the excess part along the fold you just made (there is an extra area in the previous picture, turn it over and overlap the excess with the previous one).

Expand to get the crease.

Fold it in half, don’t fold everything in half.

Expand and fold along the black line.

It becomes like this, that is, fold down the line drawn by connecting the two points in the previous step.

Fold it down.

Turn over and fold along the previous crease.

Get something like the picture above.

Fold the extra corner along the crease of the back triangle.

Start rolling (see the sharp corner? Use that to roll).

Reverse side.

Just roll the first and second ones to the left.

The other side.

After the previous step, turn it over to the wrong side and start rolling. Then repeat 3 times, that is, a total of 4 times are needed.

Assembly begins (no need to insert, just roll it up).

Take out two (that is, wrap the two big ones together).

Then look at the side and you will find two small petals.

Twin them together, the small petals must be on two different petals, and then each petal is rolled in like this.

A slight correction is to roll the petals downward.

Next start folding the box.

Prepare a square piece of paper.

Fold diagonally in half.

Expand it to get the creases in the picture above.

Fold one corner to the intersection, leaving a small fold.

Small break points.

Also make a small fold on the opposite side.

Two small turning points.

Fold one corner to the opposite endpoint.

Once expanded, repeat the above steps for the opposite corner.

Fold in the triangle next to it.

Spread out.

Fold along the black line.

This is what happened.

Fold the right half to the left along the black line.

It looks like this.

Make the isosceles right triangle twice as small.

Follow the original crease from the middle so that it looks like this.

You will find that there is an extra corner.

Then roll as before.

Also do 4.

There is a small crack here.

Put each other in.

It looks like this.

Insert each one like this.

The last one is a little more troublesome, you need both sides.

The final product (the direction doesn’t really matter).

Next attach the flower to the top of the cap.

You need to roll the three corners together.

Next start folding the bottom of the box.

It’s still a piece of paper.

Fold it diagonally once and unfold it.

Then fold along the center line and unfold.

Fold the lower edge to the center line and unfold it.

After spreading out.

Fold a small triangle so that one edge is aligned with the black line.

The same is true here.

Then fold the upper left corner and the lower right corner together.

Fold the lower isosceles trapezoid up. There may be a small bulge, that’s okay.

Fold the two bottom corners of the isosceles trapezoid in half, leaving a crease and spread it out.

Fold along the black line. It doesn’t require much effort because it already has its crease.

Fold it down so it looks like this.

Did you see a small triangle?

Turn over to the other direction.

There is a crease here along the black line.

It becomes like this.

Or do 4.

Insert one corner into the seam of the other box.

Insert it.

The same goes for the other two.

Plug the two widgets together again.

Did you find some small triangles?

Tuck them into their own triangles.

Finally, the origami Rose of Versailles box is completed!

You may still be a little confused about how to grow flowers together, so I will explain it to you in detail again. First take two petals, and fold the largest side over, which is the side with the slash, which is the side you rolled for the first time.

Spread the large petals, it is best not to spread them flat, they need a little curl.

Then, take out the second one, also spread it out, then insert the large petals together and roll them up.

Slightly spread out the small petals that are not the same petal, stack them together and roll them into a roll as shown.


Roll it up, add some special effects and it will look like this.


![[Origami Encyclopedia] Creative handmade origami video tutorial on origami Apple LOGO](https://img.111diy.com/timthumb.php?src=/d/file/20220217/dd2zin3tlq5.jpg&w=200&h=200&zc=1)

![[Complete Fish Origami] Carp Origami Illustrated Tutorial](https://img.111diy.com/timthumb.php?src=/d/file/20220217/crxjaul5f53.jpg&w=200&h=200&zc=1)


