It’s time to share the paper quilling tutorial with you again Now, many students like to make paper quills. This is because the paper quills are very elegant, beautiful and attractive. However, there are indeed very few tutorials on making paper quills that can be found on the Internet, especially excellent tutorials on paper quills. Therefore, you may have a lot of difficulties in getting started with development. It doesn’t matter what we introduce to you. This tutorial for making paper-quilled peach blossoms is to hand-make a paper-quilled peach blossom, and this is not just a simple paper-quilled flower making, but also a paper-quilled peach blossom tree. From the complete production effect of this hand-developed peach blossom tree, we can see that the entire production is not complicated, especially the application of the basic unit model developed by the paper quilling blender. It is very simple, and they are all basic and introductory paper quilling production. That is to say, after we master how to make the basic entry-level development unit, we can easily splice it to complete the development and modeling creativity. So what is the use of such a quilling paper? In fact, such quilling paper production has many uses. For example, we can paste a quilling paper peach blossom tree onto a piece of card paper, and then the card will immediately become a beautiful handmade greeting card, and it is Beautiful handmade greeting cards made from quilled paper. At the same time, we can also paste the quilling paper on the handwritten newspaper, which adds a three-dimensional effect to the handwritten newspaper. It is also an option that children need to pay special attention to and decorate when making handwritten newspapers.
Step 1:

First, roll the paper strip into a tight roll with a rolling pen. This is what the front looks like
Step 2:

This is what it looks like just after rolling the side, the thickness is 3mm
Step 3:
< p>
Use the other side of the circle pen to pull out the paper strip, as shown on the right, to make it curved.
< p>Step 4:
After the arc is out, the front side is still round, but it needs to be shaped into a heart shape, as shown on the right
Step 5:

Step 6:

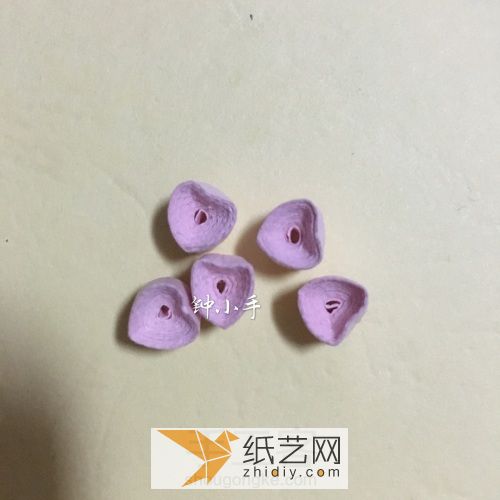
Follow the above steps to make five small hearts
Step 7:
< p> < p>Stick together, beautiful petals come out
Step 8:

The shape of the branches is paper strips rolled into loose rolls, pinched into irregular squares, and combined together It’s just the leaves
Step 9:

Finally add a few leaves, dip a few flower centers in the middle of the flowers, and the beautiful peach blossom tree is complete! Children who hope to make peach blossoms by hand Far and away!
As you can see, the production of this quilling paper has many application scenarios, and it also helps us learn the basic quilling Paper making method, in order to help us learn how to develop and splice the structure. These are what this beauty tutorial brings to us, so let us learn how to make this exquisite peach blossom paper peach tree. !


