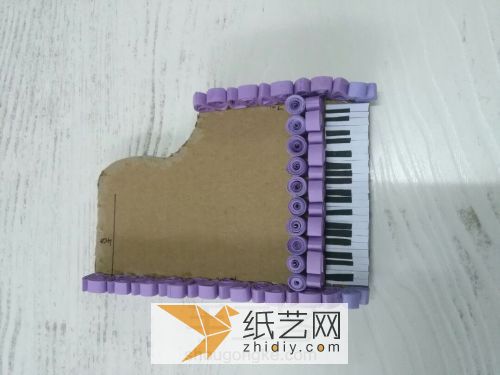
Learning the tutorials on how to make quilled paper can always bring us a lot of inspiration. This is mainly because the production of quilled paper has a very good artistic sense, especially Nowadays, everyone prefers to try some more innovative hand-made products. At this time, we can try the developed products. Some of the research and production that I have learned before are usually two-dimensional. In fact, there are some three-dimensional works that express ambition. You can also try and learn. For example, here we see this paper-quilling piano production tutorial, which is very unique. When learning specifically, we need to complete some basic processing. In fact, the production of this paper piano is also a hand-made tutorial that turns waste into treasure. The reason why it is called a hand-made tutorial that turns waste into treasure is Because before production, we saw that the overall frame structure of the piano was designed using discarded boxes from express delivery.
After finishing cutting the express box, we You can see that the structure of a piano appears, and the next thing you need to do is the basic paper quilling. There are many basic development papers, and you should be familiar with it, because we have recommended a lot of paper quilling to you before. You can refer to these tutorials for making rolls. After completing the production of the basic paper structure, we need to paste it. When pasting, it is best to follow this tutorial. Posts, and the number of posts is mainly determined based on the size of the paper rolls you make!
Step 1:

Step 2:

Purple quilling paper divided into two halves
Step 3:

Use a tool to roll it into the size shown in the picture
Step 4:

Step 5:

Use white glue to stick around the cardboard
Step 6:

Similarly used Roll half of the purple quilling paper into the size shown in the picture
Step 7:

Step 8:

Glue them together as shown in the picture
Step 9:

I forgot to take a lot of pictures when I was doing it, so let’s just take a look
Step 10:

Step 11:

Step 12:

Step 13 :

Step 14:

The four feet of the piano
Step 15:

Schematic diagram of the piano cover
Step 16:

Paste the rolled quilling paper with white glue as shown above and let it dry
Step 17:

I forgot to take photos of many steps. I will post them next time when I have time.
Step 18:
If the paper quilling rolls you make are larger, the basic units of the quilling paper rolls you need to make a piano will be fewer. If the paper quilling rolls you make are very small, This will make the entire production look more beautiful, but the amount required is also staggering, and it all needs to be adjusted accordingly according to your own needs.


