The following describes the hand-made method of fabric badges. Make your favorite pattern into a badge and sew it on a hat or clothes, or make it into a special label and attach it to a gift for others. The exquisite and special design will definitely impress others. For specific badge DIY methods, please refer to the illustrated tutorial below. It’s a very beautiful handmade craft. I highly recommend it to you. After you finish it, don’t forget to share this fabric badge with your family and friends. This is an authentic handmade work!
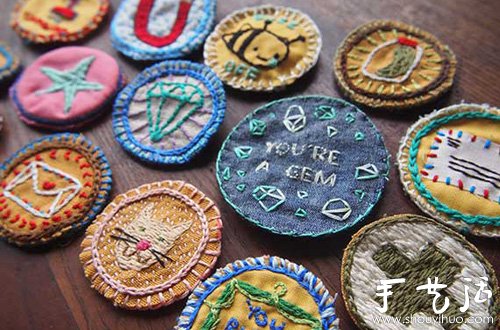
Materials for making fabric badges:
Fabrics, embroidery silk, yarn, scissors, embroidery hoops, pencils, water-soluble markers, embroidery needles, pins, diamond medal templates, and super glue.
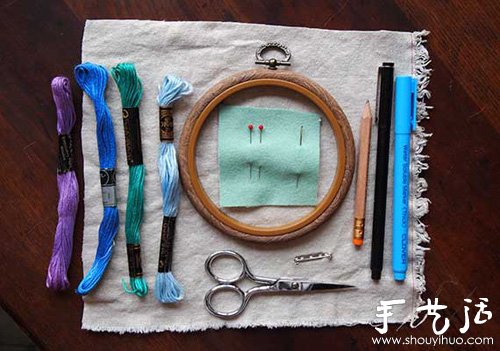
How to make fabric badges:
1. First, design the badge pattern you want to make. The pattern is best based on lines, and a simple medal logo pattern is most suitable.
2. Use a pencil to draw the pattern you designed on the drawing. It is best to have two circles, one is the outer circle of the label, and the other is the inner circle. Draw the pattern in the inner circle. After the final draft is finalized, use a black marker to mark it. pattern.
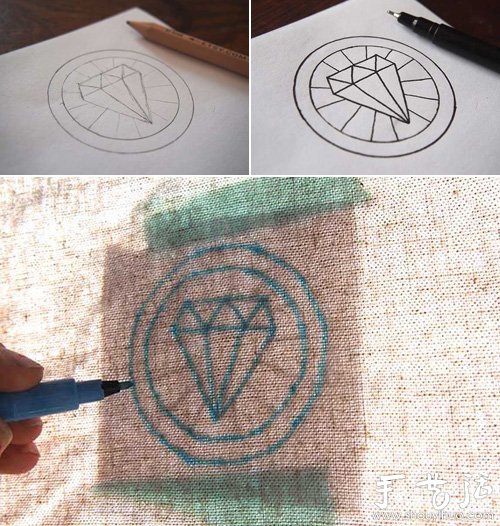
3. Place the drawing under the fabric and trace the outline of the pattern on the fabric with a water-soluble marker. If your fabric is dark, you can use chalk to trace the pattern.

4. Now you can start the embroidery process. Fix the fabric on a 4" diameter embroidery hoop, cut a piece of velvet thread about an arms length, and sew the main pattern from the back, stitch by stitch. Different parts require different sewing methods. For the radiating purple lines in the picture, you need to use the split stitch sewing method to separate the loops of the previous stitch and sew one loop after another.
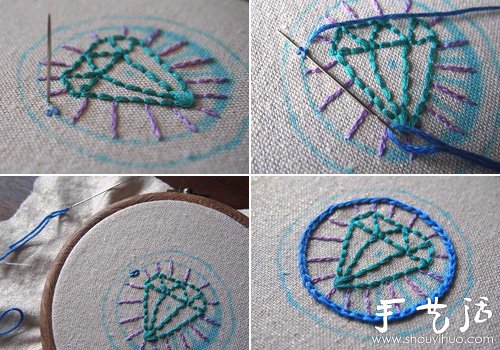
5. Next, start sewing the outside of the pattern. In order to give it a better decorative effect, you can use a chain sewing method. First sew two parallel stitches, pass the needle through the back of the fabric, and then pass it through the two threads. After tightening, pass it back through the same hole to the back of the fabric. Repeat the action to sew the chain line.
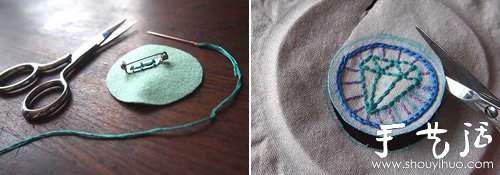
6. Cut a piece of felt that is the same size as the badge and fits the badge as the back of the badge. Sew pins onto the felt. You can also skip this step and sew the pattern directly on your schoolbag or clothes as decoration.
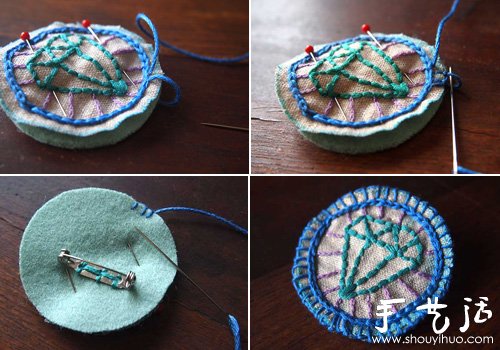
7. Pin the sewn pattern and a round piece of fabric of the same size together, sew the pin on the back layer of fabric, and start locking the two pieces.edge of fabric. Use needle and thread to make a knot around the circle, place the knot between the two layers of fabric, and bring it through with the needle from the back, so that the knot is hidden in the fabric. Repeat the hemming action until the entire circular brooch is hemmed. Finally, wash the sewn badge with water to remove any remaining watercolor color.


